How to make masala vada crispy
Masala vada, known as paruppu vada in Tamil Nadu or chana dal vada in Andhra and Telangana is one of South India’s favorite snacks. Golden brown, spicy, and crispy on the outside with a soft, flavorful center, it is one of those foods that taste better when served piping hot. Whether it is with coconut chutney or a cup of filter coffee, the crispy masala vada never fails to hit the spot. However, sometimes getting the right crisp is a challenge. It seems like just when you think you have the process down, the batter suddenly changes texture and the crispiness is nowhere to be found. The right balance of soaking, grinding, mixing, and frying are essential. A few tweaks in ingredients and temperature change the vadas’ crispiness entirely. In this article, we will learn all the secrets to how to make masala vada crispy.
- Understanding the Essence of Masala Vada
- Selecting the Right Dal: The Foundation of Crispiness
- Soaking the Dal to the Perfect Consistency
- Grinding Technique: Coarse, Not Smooth
- Building Flavor with Fresh Aromatics and Spices
- The Role of Rice Flour and Other Binding Agents
- Shaping the Vadas: Size and Thickness Matter
- Mastering the Oil Temperature for Frying
- Draining and Cooling for Maximum Crunch
- Variations and Regional Twists
- Pairing Masala Vada with Sides and Dips
- Storing and Reusing Leftover Vadas
- Conclusion
- More Related Topics
Understanding the Essence of Masala Vada
Masala vada is a traditional South Indian fritter that is typically made from chana dal or split Bengal gram, along with spices, herbs, and onions. It is different from medu vada, which is made from urad dal, as it has a coarser texture, which gives it a unique crunch. The charm of the masala vada lies in its rustic simplicity — it uses no fancy or expensive ingredients, but everyday items found in the kitchen that are combined in a manner to create magic. The coarsely ground dal is the foundation of the batter, while aromatics like green chilies, curry leaves, and fennel seeds, bring the complex flavors together. It’s all about how the dal mixture turns delightfully crisp once deep-fried while still remaining soft on the inside. Knowing these building blocks helps you understand how each step of the preparation contributes to the final texture and taste. Ensuring all these work together is what makes every bite of masala vada a satisfyingly crunchy treat.

Selecting the Right Dal: The Foundation of Crispiness
The most important component of masala vada is the dal, which is usually chana dal. It is always recommended to use fresh, good-quality lentils and not go for older dal, which are discolored or past their shelf life. This is because older dal takes a long time to soften and may change the desired texture. Rinse the lentils thoroughly until the water runs clear, as any excess starch can make the mixture sticky. Do not use substitutes like split peas or yellow moong dal, as the result will taste and feel different. Some even recommend using a tablespoon or two of toor dal (split pigeon peas) mixed with chana dal, to give more crunch to the vadas. This does not alter the taste and can make a noticeable difference in the crispness. Remember, the kind and quality of dal you use forms the base for how crispy your masala vada will turn out.
Soaking the Dal to the Perfect Consistency
Another vital step in making crispy masala vadas is soaking the dal. Soak the chana dal for about 2 to 3 hours. A short soak means the lentils will remain hard and will not grind properly. On the other hand, over-soaking results in soft, mushy dal, which also doesn’t help. The dal should be soft enough to break easily between your fingers but still have a somewhat grainy texture. Drain the soaked dal completely; you do not want any excess water in the mixture, as that will make the vadas heavy. Some cooks also recommend setting aside about a fistful of soaked dal to be added later to the ground batter. The whole dal provides added crunch to the vadas when fried. This soaking step is important, as it not only makes grinding easier but also sets the foundation for how well the vadas will crisp up later.
Grinding Technique: Coarse, Not Smooth
Did you know one of the biggest secrets to making crispy masala vadas lies in how you grind the dal? The dal should always be ground coarsely and not as a fine paste. A coarse mixture allows for air pockets to form on the inside, giving the vada that light, crispy feel. When grinding, add minimal water, just about two to three tablespoons, and pulse in short intervals to avoid overprocessing. You should still see some small bits of dal in the mixture. If the batter becomes too wet, the vadas will absorb more oil and lose their crispiness. If you make a mistake and the batter gets too wet, the best way to fix this is to add a tablespoon of rice flour or besan. The additional dry ingredients will help absorb the moisture. The grinding stage is where the texture of the vadas is determined; a perfect coarse grind is the foundation for crispiness.
Building Flavor with Fresh Aromatics and Spices
The “masala” in masala vada comes from the other ingredients that are added to the batter, including onions, green chilies, curry leaves, coriander leaves, and a pinch of fennel seeds, which build complex flavor profiles. The finely chopped onions, green chilies, and curry leaves bring a freshness and aroma to the vadas. While coriander leaves and a dash of fennel seeds add more subtle notes to the flavors. The latter especially is important as they help balance out the spice from green chilies, while also lending a slightly sweet note, which perfectly complements the dal. Crushed garlic or ginger can also be added for more flavor. Some regional variations even add mint leaves or dried red chilies for a more robust flavor. The best way to get the most of all the spices and flavors is to mix them well with the ground dal just before frying and not beforehand. The right combination of spices not only elevates the taste but also contributes to a fragrant, crispy crust which is the trademark of an authentic masala vada.
The Role of Rice Flour and Other Binding Agents
To make your masala vadas extra crispy, you can also add rice flour or semolina (rava) to the batter. Rice flour helps absorb excess moisture and gives a subtle crunch to the outer coating, while rava adds a grainy texture to the vada and keeps them from turning soggy even after cooling. Some also add a spoon of cornflour, though that can affect the original taste a bit. It is important to use a light hand when adding any of these flours, as too much of it can make the vadas hard. A tablespoon or two per cup of dal is usually sufficient. The idea is to create a mixture that can hold its shape without sticking to your hands while not feeling dry or crumbly. The right kind of rice flour or binding agent added in the correct proportions will help make your vadas crunchier and tastier.
Shaping the Vadas: Size and Thickness Matter
Shaping the masala vada also plays an important role in determining its texture. Take a small ball of the batter, about the size of a lemon, and gently flatten it between your palms to make a disc — not too thin or thick. A thinner vada will end up extra crispy, while a thick one will remain soft on the inside. For more uniform cooking, ensure all the vadas are of the same size and thickness. Dampen your palms slightly before shaping, to prevent sticking. If the mixture seems a little loose, chill it in the refrigerator for 15–20 minutes before shaping. This firms it up and helps the vadas hold their shape during frying. A well-shaped vada that has been flattened properly ensures even cooking and a uniform crunch throughout.
Mastering the Oil Temperature for Frying
The temperature of the oil for frying masala vadas can make or break the dish. If the oil is too hot, the outside will brown too soon before the inside is cooked. On the other hand, if the oil is too cold, the vadas will absorb more oil and turn greasy, rather than crispy. The ideal temperature for frying is about 170–180°C (medium heat). To test the temperature, drop a little batter into the oil; if it rises slowly to the surface with gentle bubbling, it is ready. Fry in small batches to maintain the oil temperature. Overcrowding the pan will bring down the oil’s heat, making the vadas soggy. Turn the vadas once gently, to ensure both sides cook evenly. Each batch should take 6–8 minutes to reach that perfect golden brown crispness. The right temperature is crucial in making vadas that are crunchy even after they have cooled down.
Draining and Cooling for Maximum Crunch
After frying, place the masala vadas on a wire rack or paper towel to drain any excess oil. Do not stack them right away as the trapped steam can make the crust soggy. Allow them to rest for a few minutes — this cooling period also lets the outside crisp up more. If you want them extra crispy, try double frying them: first on medium heat until golden, and then again on high heat for 30 seconds before serving. This restaurant-style hack keeps the vadas crunchy and delicious. If you are making vadas in advance and need to reheat them, do so in an oven or air fryer, and not the microwave, to retain the crisp. Handling of the vadas after frying is as important as the cooking process.
Variations and Regional Twists
Masala vada is a popular snack throughout South India, with each region adding their own twists to it. In Tamil Nadu, paruppu vada is a common street food, often prepared with garlic and small onions for more flavor. Andhra-style vadas are spicier and usually include red chilies and ginger. Some Kerala versions of masala vada incorporate grated coconut or crushed pepper, for a distinct bite. You can even make a healthier baked or air-fried version of masala vada using the same batter. Of course, the texture will be slightly different, but just as delicious. You can also make keerai vadai, by mixing chopped spinach or amaranth leaves in the batter, for more nutrition and taste. Experimenting with these regional adaptations is a great way to enjoy the dish in different ways without compromising on crispiness.
Pairing Masala Vada with Sides and Dips
While masala vada tastes great on its own, it can also be paired with certain sides and dips. Coconut chutney is the most common accompaniment as the cool, creamy texture offsets the vada’s spice and crunch. Tomato chutney or spicy garlic chutney are other options that taste great as well. In Tamil Nadu, it is common to serve it along with pongal or curd rice, as part of a complete meal. During the monsoon season or winter evenings, a plate of hot vadas with masala chai is the ultimate comfort food snack. You can even serve masala vada as a street-style vada pav by sandwiching it between buns with chutney and onions. Pairing the vadas in the right way is all about striking the balance in spice and texture.
Storing and Reusing Leftover Vadas
In case you end up with some leftover vadas, there are still ways to make them crispy again. The first step is to ensure they are properly stored, by placing the vadas in an air-tight container, once they have cooled down completely, to prevent them from becoming soggy. The best way to reheat and crisp them is in an oven or air fryer at 180°C for 5–7 minutes. Do not reheat them in the microwave as it will make them soft and chewy. Leftover masala vadas can also be used in creative ways. Crumble them into curd for vada chaat or simmer them in tamarind gravy for a tangy vada curry. These reinventions are great ways to make sure not even a single crispy bite is wasted.
Conclusion
Making masala vadas crispy is an art, as well as a science. Every step of the way, from choosing the right dal to grinding it coarsely, shaping them well and frying in the correct temperature, all add up to create that recognizable crunch. The beauty of this recipe is its simplicity, as humble ingredients, time-tested techniques, and a little patience can bring a snack that is deeply satisfying. Whether it is a tea-time treat, a festival special, or a rainy-day indulgence, masala vada is always full of joy, with each bite.
The secret to getting it right every time lies in keeping these golden rules in mind — do not over-soak the dal or grind it too fine, ensure that all the vadas are of an equal size and thickness, and fry them in well-heated oil. The sprinkle of rice flour, the fragrance of curry leaves, and the heat from the green chilies is what brings it all together. After all, the secret to making crispy masala vadas does not lie only in the ingredients, but also in the care and attention you put in during the entire process. Once you have mastered the details, every vada you prepare will be golden brown, crunchy, and utterly irresistible.
 How to Make the Most of Your Holiday Break
 The Best Winter Destinations for a Cozy Getaway
 How to Organize Your Holiday Travel Plans with Ease
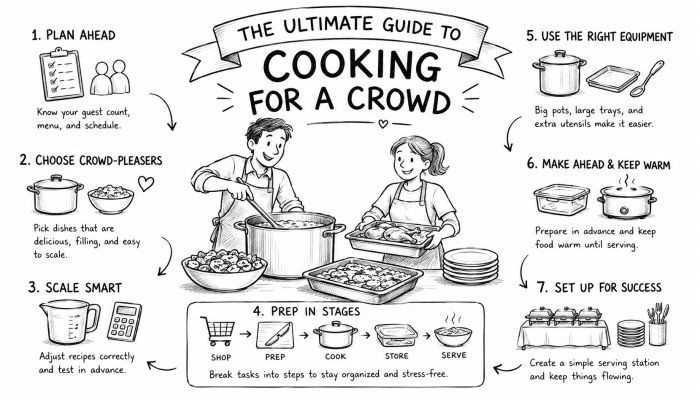 The Ultimate Guide to Cooking for a Crowd
 How to Make Healthy Comfort Food Without the Guilt
 5 Delicious Vegan Breakfast Ideas You Can Make in Minutes