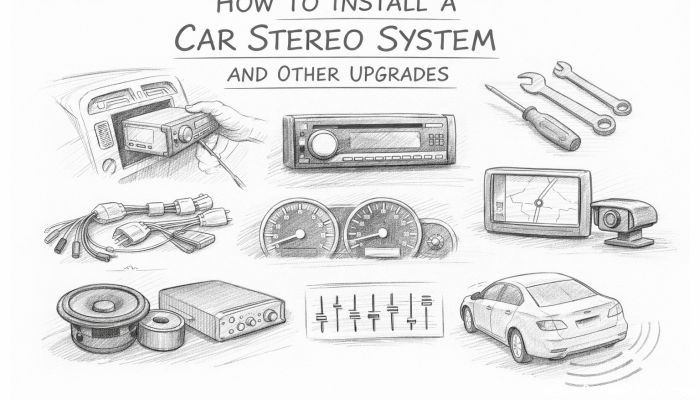
How to Install a Car Stereo System and Other Upgrades
Upgrading your car’s audio system can transform your driving experience, turning mundane commutes into enjoyable journeys filled with your favorite music. Installing a new car stereo system is more than just swapping out hardware—it’s about enhancing sound quality, integrating modern technology, and customizing your vehicle to fit your lifestyle. Whether you’re a seasoned car enthusiast or a beginner eager to improve your ride, understanding the installation process and exploring related upgrades can empower you to create a personalized audio setup. This comprehensive guide will walk you through the step-by-step process of installing a car stereo system and explore other valuable car upgrades that complement your new audio system. By the end, you’ll be ready to take your vehicle’s entertainment to the next level.
- Choosing the Right Car Stereo System
- Gathering Necessary Tools and Materials
- Disconnecting the Car Battery for Safety
- Removing the Old Stereo Unit
- Understanding the Wiring Harness and Connections
- Installing the New Wiring and Harness Adapter
- Mounting the New Stereo Unit into the Dash
- Testing the Audio System Before Final Assembly
- Reassembling the Dashboard and Securing Panels
- Upgrading Speakers for Enhanced Sound Quality
- Adding a Subwoofer for Deep Bass
- Installing an Amplifier to Boost Power
- Integrating Modern Features: Bluetooth, Navigation, and More
- Maintenance Tips for Your Upgraded System
- Conclusion
- More Related Topics
Choosing the Right Car Stereo System
The first step in upgrading your car audio is selecting the right stereo system. Consider factors such as compatibility with your vehicle, audio features, connectivity options, and budget. Popular options include single-DIN or double-DIN units, the latter providing more features like touchscreens and smartphone integration. Look for systems that support Bluetooth, Apple CarPlay, or Android Auto for seamless wireless connectivity. Ensure the stereo’s power output matches your speakers to avoid distortion or damage. Reading user reviews and consulting compatibility charts will help you make an informed choice suited to your vehicle and preferences.
Gathering Necessary Tools and Materials
Before you begin the installation process, assembling the required tools is crucial for a smooth experience. Basic tools typically include screwdrivers (Philips and flathead), wire strippers, crimp connectors or soldering equipment, electrical tape, panel removal tools, and a wiring harness adapter. If your new stereo requires mounting brackets or dash kits, make sure these are compatible with your vehicle’s dashboard. Having everything ready beforehand minimizes frustration and ensures you’re prepared for unforeseen challenges during installation.
Disconnecting the Car Battery for Safety
Safety is paramount when working with a car’s electrical system. Start by disconnecting the negative terminal of your car battery. This step prevents electrical shorts or shocks while you work on the stereo’s wiring. Failing to do so can result in blown fuses or damage to the vehicle’s electrical components. Use a wrench to loosen the battery clamp, and once disconnected, avoid touching any wires or metal surfaces that could cause a short.
Removing the Old Stereo Unit
Removing the existing stereo is the first hands-on step in the upgrade process. This usually involves removing trim panels or dashboard components to access the head unit. Many vehicles have specialized clips or screws securing the stereo; use the appropriate tools to remove these safely. Carefully pull out the old stereo, disconnecting the wiring harness and antenna cable. Keeping these parts intact is helpful, especially if you plan to reuse specific connectors or need to reference them during the new installation.
Understanding the Wiring Harness and Connections
Wiring is often the most intimidating part of stereo installation, but understanding the wiring harness can simplify the task. Most car stereos use standardized color-coded wires corresponding to power, ground, speakers, and antenna. Using a wiring harness adapter designed for your car model allows you to connect the new stereo without cutting factory wires. This adapter matches the vehicle’s wiring colors to the stereo’s wires, enabling a plug-and-play connection that preserves your car’s integrity and makes future maintenance easier.
Installing the New Wiring and Harness Adapter
Once you’ve examined the wiring harness, it’s time to splice connections or use crimp connectors to attach your harness adapter to the stereo’s wiring. Make sure each connection is secure and insulated to prevent short circuits. Pay attention to matching the speaker wires properly (left/right, front/rear) and connecting power wires like constant 12V and switched ignition power. If your stereo has additional wires for features such as a power antenna, amplifier turn-on, or illumination, consult the user manual to wire them correctly.
Mounting the New Stereo Unit into the Dash
With wiring complete, carefully slide the new stereo unit into the mounting bracket or dash kit. Ensure it fits snugly and aligns with your car’s dashboard for a clean, factory-like appearance. Secure the stereo using the screws or clips provided. Double-check that all wires are tucked away safely and not pinched during installation. If your system includes a touchscreen or additional modules, set them up according to the instructions to avoid damage during mounting.
Testing the Audio System Before Final Assembly
Before reassembling the dashboard, test the stereo system to verify all connections and features work properly. Turn on the ignition and power up the stereo. Check for audio output from all speakers, proper reception of radio signals, and functional Bluetooth or connectivity features. Adjust the equalizer settings to ensure optimal sound performance. If any issues arise, such as no sound or static noise, troubleshoot wiring connections or consult the manual to resolve the problem before proceeding.
Reassembling the Dashboard and Securing Panels
Once satisfied with the stereo’s performance, reassemble the dashboard and reattach any panels or trim removed during the installation. Use the appropriate clips and screws to secure each piece firmly. Take care not to press too hard on fragile plastic parts. Clean the dashboard to remove fingerprints or dust, and ensure your new stereo integrates seamlessly into your car’s interior aesthetics.
Upgrading Speakers for Enhanced Sound Quality
Installing a new stereo is just the beginning—upgrading your car’s speakers can dramatically improve sound clarity and depth. Factory speakers are often basic and not designed for high-quality sound. Consider replacing them with component or coaxial speakers that match your stereo’s power output. Component speakers, with separate tweeters and woofers, deliver superior sound separation and detail. Be mindful of speaker sizes compatible with your car’s doors or dash, and ensure proper mounting for durability and sound performance.
Adding a Subwoofer for Deep Bass
For bass lovers, integrating a subwoofer is a game-changer. A subwoofer handles low-frequency sounds that standard speakers cannot reproduce effectively, adding depth and punch to your music. Choose a subwoofer enclosure that fits your vehicle, whether it’s a compact powered subwoofer or a larger passive unit connected to an external amplifier. Proper placement and installation are key to achieving balanced sound and preventing rattles or vibrations inside the car.
Installing an Amplifier to Boost Power
If you want to maximize audio performance, adding an amplifier provides clean power to your speakers and subwoofer. An amplifier can drive higher wattage than the stereo’s built-in output, reducing distortion and improving volume. Choose an amplifier with the correct power rating and channels matching your speakers. Installation involves running power cables from the battery, grounding the amplifier, and connecting signal wires from the head unit. Secure mounting and proper ventilation prevent overheating and ensure long-term reliability.
Integrating Modern Features: Bluetooth, Navigation, and More
Modern head units offer a wealth of features beyond music playback, such as Bluetooth calling, smartphone navigation, voice control, and streaming apps. When selecting and installing your stereo, explore these added functionalities to enhance convenience and safety. Some systems also support backup cameras or hands-free wireless charging, making your car smarter and more connected. Ensure these features are configured correctly to work seamlessly with your smartphone and other devices.
Maintenance Tips for Your Upgraded System
To keep your new car stereo and upgrades in peak condition, regular maintenance is essential. Avoid exposing components to extreme heat or moisture, which can damage wiring and speakers. Clean the touchscreen and control knobs gently to prevent wear. Periodically check that wiring connections remain secure and free of corrosion. Keeping firmware and software updated on touchscreen units can improve functionality and fix bugs. Routine care maximizes the lifespan and enjoyment of your investment.
Conclusion
Upgrading your car stereo system and adding complementary audio components can remarkably enhance your driving experience, offering improved sound quality, modern technology, and personalized style. By carefully selecting compatible equipment, following safety guidelines, and mastering each installation step, you can confidently transform your vehicle’s audio setup. Additionally, integrating speaker upgrades, subwoofers, and amplifiers can further elevate sound performance, while modern features keep you connected and entertained on the road. With proper maintenance, your upgraded system will provide years of audio enjoyment, turning every drive into a captivating sound adventure. Whether you choose to tackle the installation yourself or seek professional assistance, understanding the process empowers you to make informed decisions and enjoy your car’s full audio potential.
 Big O Notation Explained for Beginners
 AI in Gaming: Smarter NPCs and Environments
 Understanding Bias in AI Algorithms
 Introduction to Chatbots and Conversational AI
 How Voice Assistants Like Alexa Work
 Federated Learning: AI Without Sharing Data